What’s a great way to remember your 2020 New Year’s Resolutions and save money by creatively DIY-ing your own décor instead of splurging on new swag?
By killing two birds with one stone and making this trendy framed artwork with your own customized text, using Pro® JLAR II (Clear to the Core tape) and a couple of UGlu® Dashes!
If you’ve been browsing your local department store, you’ve probably seen really similar art pieces in the home décor section. Now, with this really simple, amazing Pro® JLAR tape hack, you can create your own beautiful message (or artwork!)
Plus, once you’ve tried this craft, I bet you can figure out all kinds of way to use Pro® JLAR… making labels, collages, etc. If you make anything amazing and take great photos, remember to send your photos to us here for free giveaways!
Now let’s get started. You can watch the video to see how it’s done, but be sure to come back and read the blog below to get all of the step-by-step details.
Supplies:
- 2†wide Pro® JLAR II
- UGlu® Dashes
- Two (2) flat-faced frames of the same style/color, 5″ x 7″
- a bowl for water
- a towel for letting your tape dry (microfiber is best)
- scissors
- printer with black ink
- Word or Image editing software of your choice (we used canva.com)
Step 1: Design Your New Year’s Resolutions Text and Print It
First, you need to write out your resolutions. There’s a lot of ways you can go about doing this: using Microsoft Word, Adobe Photoshop, or any other software that lets you write and edit text and print it.
I decided to use canva.com to help me out! With Canva, I can get inspired by so many great font choices and lots of pre-designed templates. Then, I can set my own image size (5†x 7†in this case) so I know I’m working in the right dimensions for my frames.
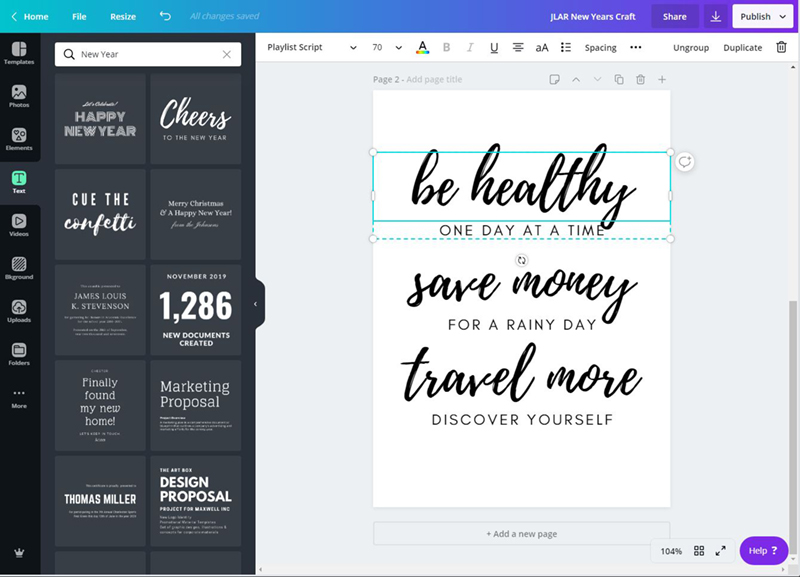
The trick is to think about how the text might get divided up when you put it on Pro® JLAR. This will be easier to understand after you’ve finished watching the video (and maybe done a few test runs with Pro® JLAR to practice!) In my design above, you can see I divided up my resolutions into three big “chunks.â€
I saved my design as a high quality JPEG and printed it out. Believe it or not, all you need to make this tape hack work is a regular printer and regular black ink – nothing fancy. But to print it at the right size, I still had to play around with my printer settings to get it to be the right size.
I printed at 35% of the original image size, and I used the cardboard backing from one of my frames as a comparison, to see whether I should print a little bigger or smaller. You’ll have to experiment and see what you like best!
Step 2: Prep Your Frames, Tape, and Other Supplies
Gather all of your supplies in one spot so you’ve got everything within reach. Have your towels ready, and fill the bowl up with warm water. Keep your towel next to your bowl.
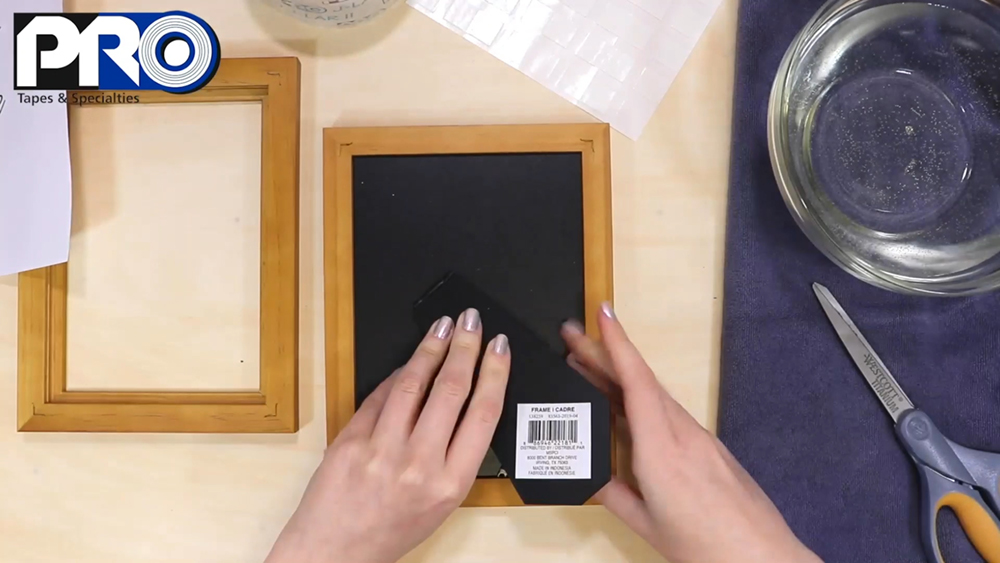
To prepare your frames, remove the cardboard backing and the glass (and keep them around for future crafting activities!)
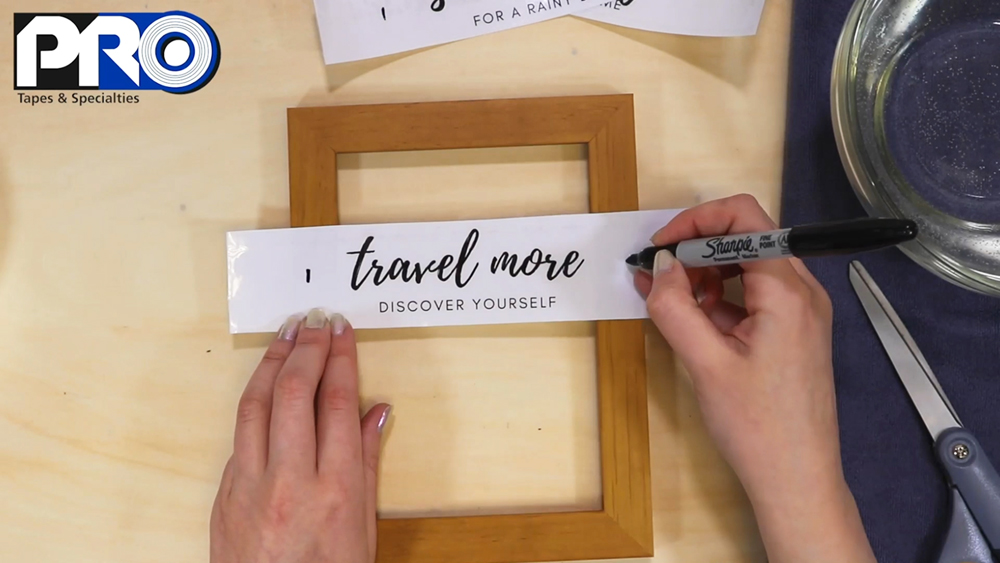
Step 3: Cover your Printed Text with Pro® JLAR
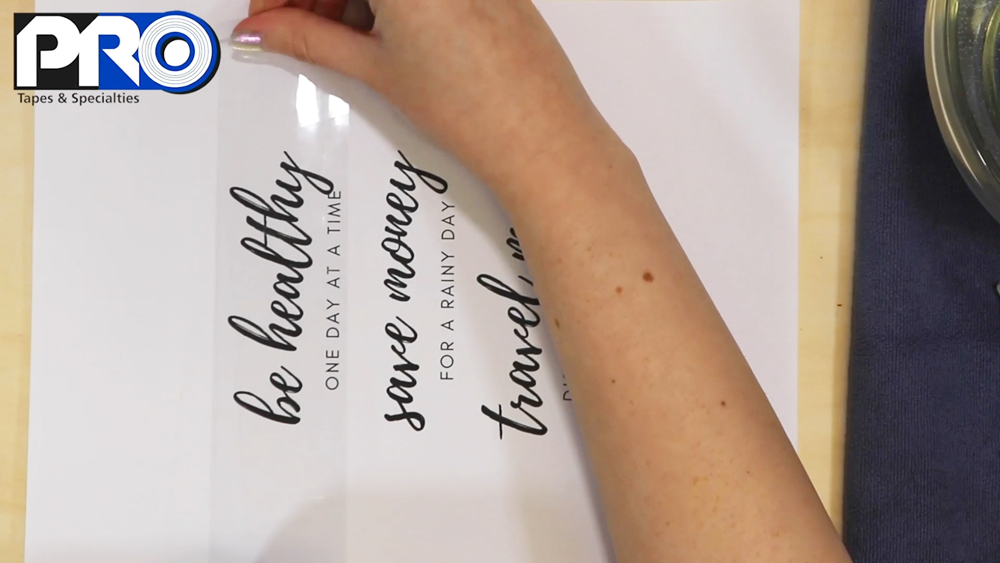
I’m using 2†wide Pro® JLAR, and I made sure to size each of my text areas or “chunks†to fit inside one strip of Pro® JLAR.
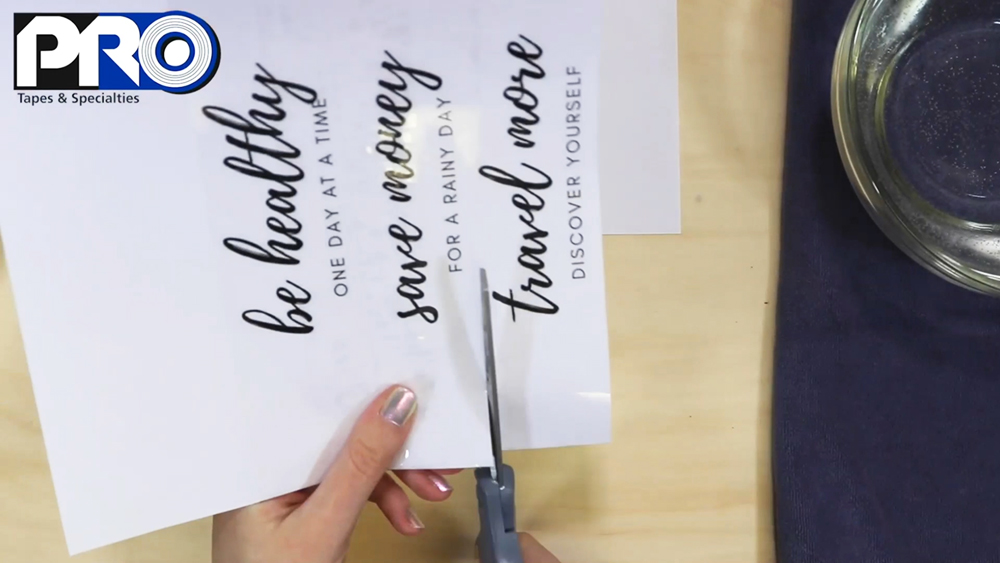
So now you can take your tape and apply it across your text, from one end of the paper to the other. Once your text is fully covered by the tape, grab your scissors and cut each strip of text out.
Step 4: Trim the Excess off Your Pro® JLAR Strips
Before you go on to the next step, you want to trim the excess off your strips. You’ll be sticking these strips to your frames later, and you don’t want them to be wider than your 7†frame.
To make it easy, instead of measuring, I just placed my strips on top of one of my frames, eyeballed where I wanted to center my text, marked off how much excess paper I needed to cut off, then cut.
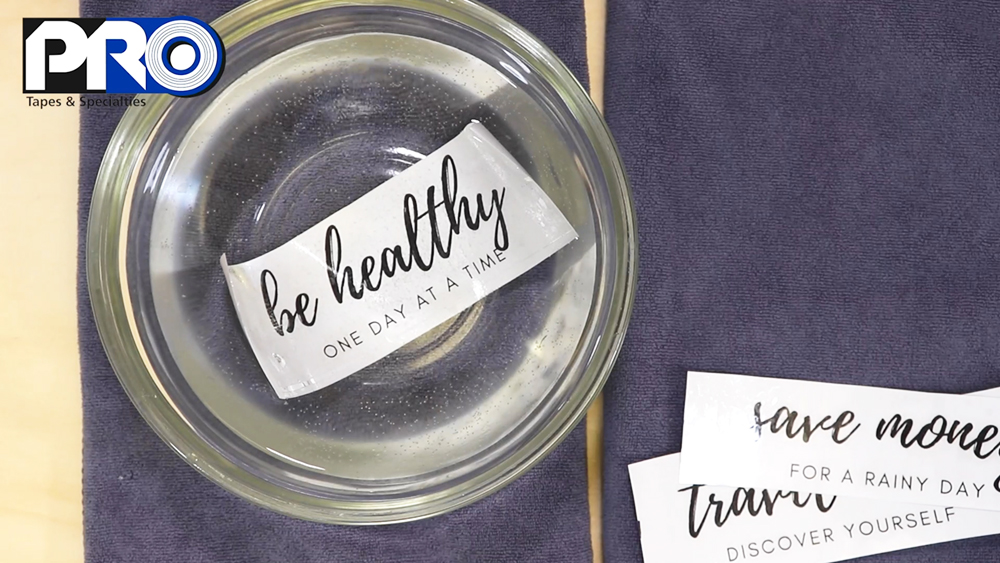
Step 5: Soak your Pro® JLAR Text Strips in the Water
Now you can place your JLAR strips in your water bowl, ONE strip at a time. It doesn’t matter too much if the water is warm or room temperature, but it’ll feel nicer for your hands later if the water is warm.
Let your Pro® JLAR text strip soak for 1 – 2 minutes. You’ll know it’s ready for the next step when the paper on the back feels loose to the touch, like you could rub it off easily… because that’s what we’ll be doing!
Once the text strip has fully soaked, begin using your thumbs to rub the paper backing off in little circles. You’ll see that the paper rubs off, but the black printer ink does not.
Your goal is to fully rub off ALL of the paper, so all you have left is the Pro® JLAR tape and the black ink on it.
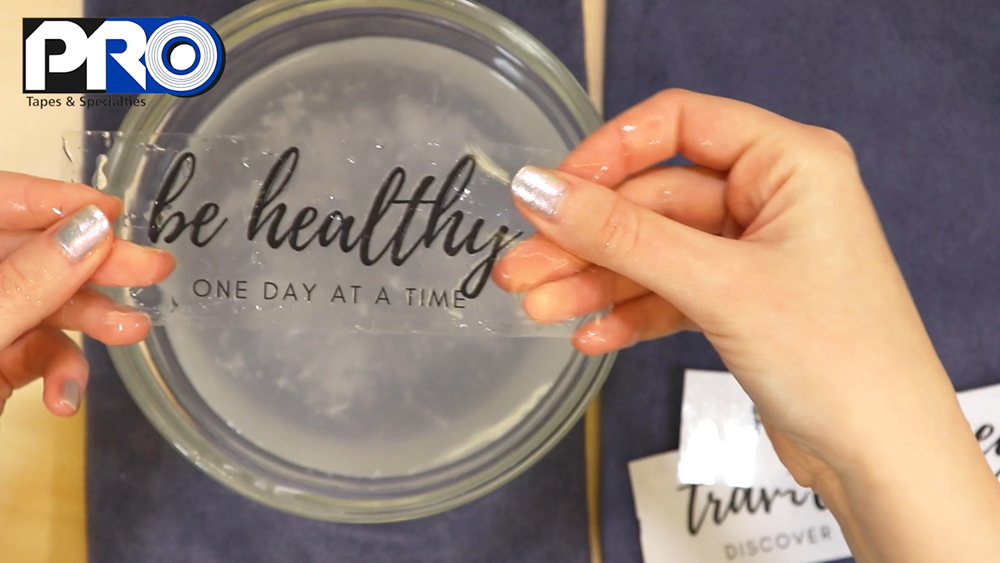
Don’t be afraid to rub as hard as you can – the ink really won’t come off! You want to get every last bit of paper off, especially on the letters. Even when you think you’ve rubbed all of the paper off, scrub it just a bit more to be really sure.
Once your Pro® JLAR tape strip is all clear, place it NON-STICKY side down onto a towel. Right now, your tape might not feel very sticky, but as it dries, it will become just as sticky as it used to be!
That’s why you want to be careful to but it NON-STICKY side down, and be aware of anything that might touch or get stuck to the tape.
A microfiber towel is the best thing to lay your tape down on, as it doesn’t have any stray fluff that could get stuck to your tape. Let your tape strip dry for 8 – 10 minutes (more or less, depending on the temperature of your room.)

Repeat this process with each of your Pro® JLAR strips. I recommend changing the water between strips, so the water isn’t too cloudy with paper pulp. If you have too much paper pulp floating around, it could stick to the tape and be hard to remove later.
After the strips are dry, if you see some paper residue still left, you can go ahead and soak them again to remove any extra left.
Fun fact: You don’t have to wait until absolutely all of the water is dried off of your tape strips before you stick them down. If you’ve got a couple of beads of water left on the surface, the Pro® JLAR tape should still stick where ever you need it to be without any problem.
Even while recording the demo video above, I can guarantee that I didn’t wait for every bead of water to evaporate.
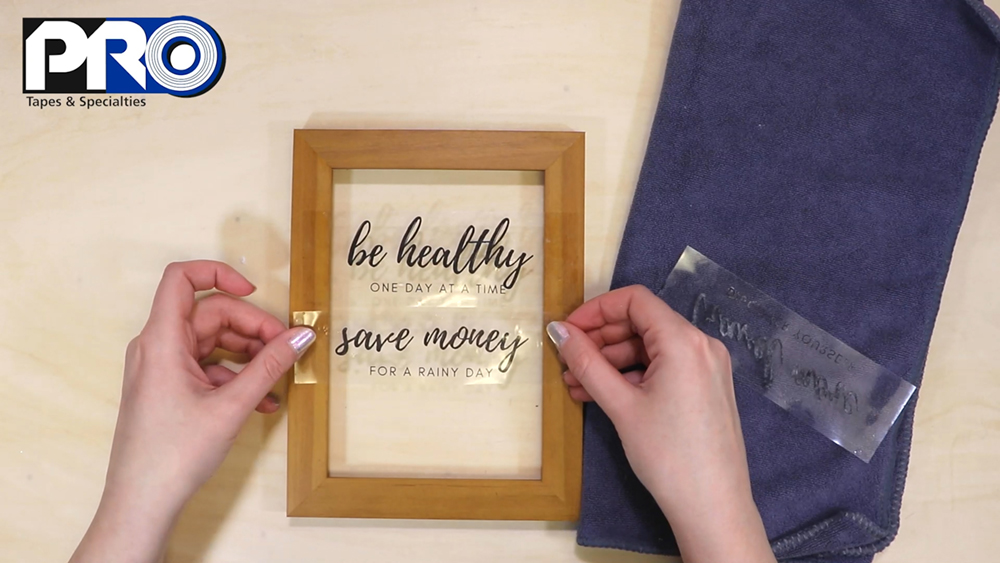
Step 6: Stick Your Pro® JLAR Tape Strips to your First Frame
Your tape strips should be ready to stick down now. Here’s where your artwork is really going to come together!
Take one of your frames, and begin sticking each of your strips down across it. You want to make sure you’re sticking them to the FLAT front of the frame, because we will be sticking our second frame on top, and a flat surface will work the best for making sure everything sticks together (ba-dum-tish!)
Once you’re done, if there are any gaps going across the frame above, below or between your text that aren’t covered with Pro® JLAR, go ahead and fill in the gaps with more Pro® JLAR. Trim any excess so nothing sticks out past the edges of the frame.

Step 7: Attaching Your Second Frame on Top with UGlu® Dashes
Now, place a UGlu® Dash in each corner of the frame. Stick them down first, then peel off the paper backing.
Grab your second frame and carefully line up how you’re going to place it on top of the first frame. Press it down, then gently squeeze at each corner where the UGlu® Dashes are to secure the bond.
If you do mess up your alignment of the two frames, you can remove the top frame by twisting it off of the second one. Do not pull directly up! UGlu® is designed to resist your typical upward pulling motion (very strongly!) so slide or twist your frame off instead.

Step 8: Seal off the Back of Your Artwork
To make sure nothing gets stuck to the back of your nice New Year’s Resolutions, seal off the back of your artwork with a couple more strips of Pro® JLAR.
Flip your artwork to the back and tape down more strips across the back, making sure you place the tape sticky side IN to the artwork (and non-sticky side facing out.)
Final Step: Display your New Year’s Resolutions Frame Art with Pride!
Now you can display your resolutions proudly on your desk, book shelf, kitchen counter, side table – where ever you like!
You’ll be reminded of your goals for the year, AND you’ll have a nice new piece of custom décor that’ll have everyone wondering where you bought it from. Just tell them it’s all your own work – with a little help from Pro® JLAR!

Did you try this craft out, or maybe you got inspired to use Pro® JLAR in another way? Share your photos with us here and you can receive free giveaway prizes!
ZGAR bar 4000 Puffs
ZGAR electronic cigarette uses high-tech R&D, food grade disposable pod device and high-quality raw material. All package designs are Original IP. Our designer team is from Hong Kong. We have very high requirements for product quality, flavors taste and packaging design. The E-liquid is imported, materials are food grade, and assembly plant is medical-grade dust-free workshops.
Our products include disposable e-cigarettes, rechargeable e-cigarettes, rechargreable disposable vape pen, and various of flavors of cigarette cartridges. From 600puffs to 5000puffs, ZGAR bar Disposable offer high-tech R&D, E-cigarette improves battery capacity, We offer various of flavors and support customization. And printing designs can be customized. We have our own professional team and competitive quotations for any OEM or ODM works.
We supply OEM rechargeable disposable vape pen,OEM disposable electronic cigarette,ODM disposable vape pen,ODM disposable electronic cigarette,OEM/ODM vape pen e-cigarette,OEM/ODM atomizer device.

ZGAR bar 4000 Puffs Disposable Vape, bar 4000puffs,ZGAR bar 4000 Puffs disposable,ZGAR bar 4000 Puffs,ZGAR bar 4000 Puffs OEM/ODM disposable vape pen atomizer Device E-cig
Zgar International (M) SDN BHD , https://www.zgarvape.com